grails 맛보기
한번 튜토리얼 해보고 경험해보고자 해서 진행한다.
grails를 선택하게 된 이유는 다음과 같다.
** 비즈니스 관계자는 보통 근사한 데이터 베이스 테이블 편집기를 개발하는데만
너무 많은 노력을 들인다. 올바른 도구를 선택하지 않았다면 공들여 다룬 CURD 기반
솔루션의 비용이 너무 커진다.
CRUD가 타당한 선택일 때가 그루비 앤 그레일스(Groovy and grails),
루비온 레일스(Ruby on Rails) 같은 언어 및 프레임 워크가 비로소 합리적인 순간이다.
도메인 주도 설계 구현
http://www.kyobobook.co.kr/product/detailViewKor.laf?ejkGb=KOR&mallGb=KOR&barcode=9788960778429
매우 간단하고, 일반적인 내용이지만 충분히 spring boot로도 설정이 편리해진 상태에서 과연 grails는 어떤 장점이 있는지 알아보도려 시작해보았다.
참고한 블로그 게시글은 아래와 같다.
https://www.baeldung.com/grails-mvc-application
https://www.jetbrains.com/help/idea/getting-started-with-grails3.html
우선 Intellij에서 그루비를 구동 시키는 것을 목적으로 하고, 다음과 같이 로컬에 셋팅한다.
http://grails.org/download.html
This tool makes installing Grails on any Unix based platform (Mac OSX, Linux, Cygwin, Solaris, or FreeBSD) easy. Simply open a new terminal and enter: $ curl -s <https://get.sdkman.io> | bash Follow the on-screen instructions to complete installation. Open a new terminal or type the command: $ source "$HOME/.sdkman/bin/sdkman-init.sh" Then install the latest stable Grails: $ sdk install grails If prompted, make this your default version. After installation is complete it can be tested with: $ grails -version That's all there is to it! * 정상적으로 설치되면 Grail 버전이 보인다.
grails를 설치 한 뒤 Intellij에서 Grails 프로젝트를 하나 생성한다.
생성이 완료되면 아래와 같이 폴더들이 생성된다.
(처음 프로젝트라면 꽤 걸린다.)
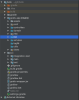 Grails 폴더 구조는 위 블로그에 명시되어 있다.
assets** – static file, javascirpt나 image파일등을 위치.
conf – project의 설정 파일들이 위치.
application.yml* 파일에는 기본적인 web app 설정들이 들어있다. 데이터 소스나 mime type 등, 그리고 Grails 또는 Spring 에 관련된 설정들이 있다.
resources.groovy Spring bean 정보를 포함하고 있다.
logback.groovy logging 설정이 포함되어 있다.
controllers – 응답과 요청, view등을 다루는 내용들이 있다. 규칙에 의해서 파일 이름과 Controller, 프레임워크의 기본 URL 맵핑과 관련된 컨트롤러등이 생성된다.
**domain **– grails 애플리케이션의 비즈니스 모델을 담고 있다. 각 클래스들은 여기에 위치하며 GORM으로 인하여 Database와 맵핑 된다.
i18n – used for internationalization support
init – an entry point of the application
services – 애플리케이션의 비즈니스 로직이 위치한다. Grails 컨벤션에 의해서 각 서비스들의 싱글톤 spring bean을 생성한다.
**taglib **– the place for custom tag libraries
views – View와 template 정보를 포함한다.
튜토리얼에 따라 Student Entity의 CRD를 만들어보자.
기본적으로 명령어로 작성되어지는 것과 같다.
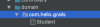
도메인 레이어 생성
grails create-domain-class com.hello.grails.Student 콘솔에 위와 같이 명령어를 실행하면 아래처럼 생성되어진다.
이곳에 클래스 정의를 블로그 내용와 같이 입력한다.
class Student { String firstName String lastName } 서비스 레이어를 생성.
서비스에 정의되는 기능은 아래와 같다.
-
students의 list 를 조회하는 것.
-
새로운 Students를 생성하는 것.
-
존재하는 students를 제거하는 것.
grails create-service com.baeldung.grails.Student 명령어를 실행하면 아래와 같이 생성된다.
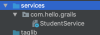
StudentService에는 다음과 같이 작성한다.
@Transactional class StudentService { def get(id){ Student.get(id) } def list() { Student.list() } def save(student){ student.save() } def delete(id){ Student.get(id).delete() } } 컨트롤 레이어 생성
grails create-controller com.baeldung.grails.Student 위와 같이 명령어를 입력한다.
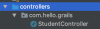 그리고 생성된 컨트롤러에 다음과 같이 작성한다.
class StudentController { def studentService def index() { respond studentService.list() } def show(Long id) { respond studentService.get(id) } def create() { respond new Student(params) } def save(Student student) { studentService.save(student) redirect action:"index", method:"GET" } def delete(Long id) { studentService.delete(id) redirect action:"index", method:"GET" } } 뷰 레이어를 생성
기본적으로 Grails 프로젝트를 생성하면 View layer가 생성된다.
튜토리얼을 이용하여 student view를 작성해도 이 template를 따라가니 당황하지 말자.
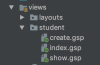 index.gsp
** - Create create.gsp
show.gsp
- Students list 유닛 Tests**
Grails는 spock의 이점을 주로 테스팅 목적으로 사용 할 수 있다.
만약 당신이 스포크에 친숙하지 않다면 튜토리얼을 한번 공부하고 와라.
StudentController의 index() 액션을 테스트 해보자.
project내 test 폴더를 확인해보면 다음과 같이 test class들이 이미 만들어져 있다..
 킹갓
테스트는 링크에 저장된 형태대로 작성하면 된다.
이후 intellij를 이용하여 start를 해보자.
 application.yml에 개발 스테이지 프로덕트 등으로 프로퍼티도 미리 셋팅이 된다.

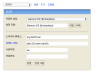
list화면
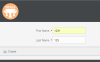
 create 화면
 create 하고 나면 리스트에 새로 데이터가 등록되어있다.
 view 화면
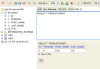
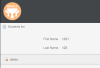 등록되어있는 데이터를 확인해보자.
기본적 셋팅으로는 h2db에 생성된다.
 Domain class를 작성한대로 Student 테이블이 생성되어 있고,
data도 들어있다.
아주 간략하게 맛뵈기로 해봤는데 시간 날 때 마다 만들어봐야겠다.